Apple cider vinegar is a versatile kitchen staple with numerous health benefits and uses. Making your own apple cider vinegar at home is not only economical but also allows you to control the quality of the ingredients. Follow this simple guide to create your own homemade apple cider vinegar.
Ingredients:
- Apples: 6-8 medium-sized organic apples (or apple scraps)
- Sugar: 1 cup
- Water: Enough to cover the apples
- Glass jar: Large enough to hold the apples and water
- Cheesecloth or coffee filter
- Rubber band or string
Instructions:
Step 1: Prepare the Apples
- Wash the Apples: Thoroughly wash the apples to remove any dirt or pesticides. If using apple scraps, make sure they are clean and free from any mold.
- Chop the Apples: Cut the apples into small pieces, including the cores. You can also use apple peels and cores left over from other recipes.
Step 2: Start the Fermentation
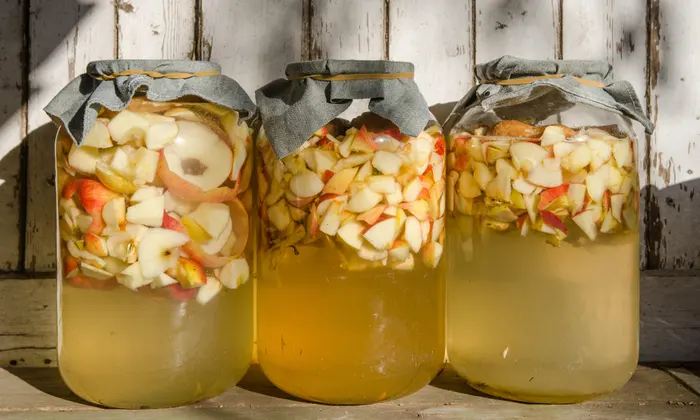
- Fill the Jar: Place the apple pieces into the glass jar, filling it about three-quarters full.
- Add Sugar and Water: Dissolve the sugar in water and pour it over the apples until they are completely submerged. Leave some space at the top of the jar to allow for expansion during fermentation.
- Cover the Jar: Cover the jar with a cheesecloth or coffee filter and secure it with a rubber band or string. This allows air to enter while keeping insects out.
Step 3: Ferment the Apples
- Store in a Dark Place: Place the jar in a warm, dark place (like a cupboard) for about 2-3 weeks. Stir the mixture every few days to help prevent mold from forming.
- Check for Fermentation: After a few weeks, you should notice bubbles forming, indicating that fermentation is happening. The mixture will begin to smell like vinegar.
Step 4: Strain and Age
- Strain the Liquid: After 3-4 weeks, strain the liquid through a fine mesh strainer or cheesecloth into a clean jar, discarding the apple solids.
- Cover and Store Again: Cover the jar with the cheesecloth and secure it with a rubber band. Store it again in a dark place for another 3-4 weeks to allow the vinegar to fully develop its flavor.
Step 5: Bottle and Enjoy
- Taste the Vinegar: After a total of 6-8 weeks, taste the vinegar. If it has reached your desired acidity, transfer it to a bottle and seal it with a lid.
- Store: Keep the vinegar in a cool, dark place, where it will continue to mature and develop complex flavors over time.
Uses for Apple Cider Vinegar
Homemade apple cider vinegar can be used in a variety of ways. Add it to salad dressings, marinades, and sauces, or use it as a natural cleaning agent. Many people also enjoy its health benefits, such as aiding digestion and improving skin health.
Creating your own apple cider vinegar at home is a rewarding process that not only provides a natural, flavorful product but also reduces waste by utilizing leftover apple scraps. Give it a try and enjoy the fruits of your labor!